Securing your WordPress installation should be one of the very first things you do! Many will install WordPress and then never enable this very important security feature! This tutorial will walk you through how to setup captcha in WordFence plugin which will secure your website from bots doing repeated account and password resets on your account. Bots can do this thousands of times a day robbing your website of performance!
STEP 1: Visit this URL for instructions on how to get your Site Key and Secret Key generated.
STEP 2: If you do not have WordFence Plugin installed already, install it via your WordPress Admin:

STEP 3: After installation, click on WordFence on the left Admin Menu. Then Login Security, then Settings at the top.

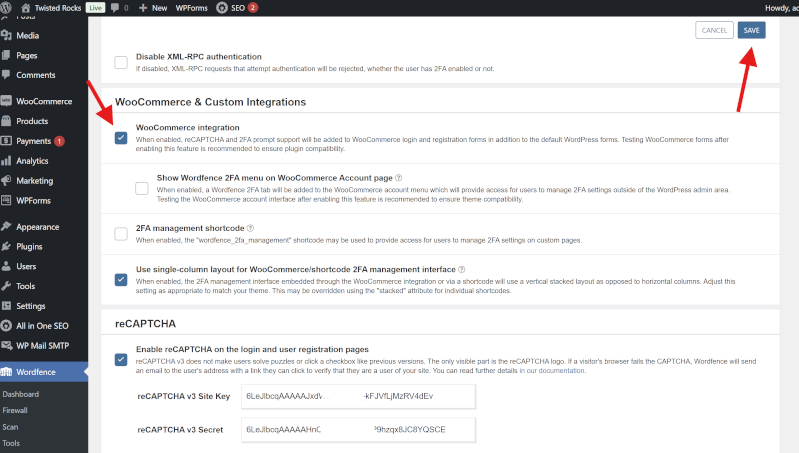
STEP 4: Scroll down and paste your Site Key and Secret key from Step 1 here! Then hit Save. (if you have Woocommerce installed, look at Step 5 before saving.

STEP 5: Check the WooCommerce checkbox. Then click Save in the upper right!
STEP 6: Visit your site to ensure the captcha is working! If you see the captcha icon, you are now MUCH safer! Good job!
